
At Roanoke Roofing Company, we specialize in roof sealant repairs that stop leaks fast and protect your property. We use high-quality silicone and polysulfide sealants designed to create a watertight barrier.
Our expert team provides professional roof sealant repairs that last, with most jobs completed in just one day to minimize disruption to your home. We carefully inspect the damaged area, clean and prepare the surface, and apply the appropriate sealant to match your existing roofing material. This creates a durable seal that prevents water from getting inside.
We know roof problems don't always happen during business hours. That's why we offer 24/7 emergency roof repair services throughout Roanoke, VA. Our licensed and experienced technicians arrive quickly to assess the damage and make needed repairs before small issues become major headaches. With years of experience serving local homeowners, we take pride in delivering reliable roof repairs that keep your family safe and dry.
What Are Roof Sealants?
Roof sealants play a key role in keeping your home dry and protected. We use different types of sealants at Roanoke Roofing Company to fix leaks and prevent water damage. Silicone roof sealants work great for tough spots and last a long time in the sun. They stick well to metal, concrete, and most roofing materials. These sealants can handle extreme temperatures and won't crack over time.
Another option we often use is elastomeric coating. This roof type spreads across your roof like rubber and moves with the building as it settles. It works really well for fixing bigger areas that need protection. For metal roofs, we apply special metal roof sealants that stop rust and fight corrosion. These sealants bond directly to the metal surface and create a strong barrier against rain and moisture.
We also work with liquid rubber solutions for quick fixes. These products fill gaps fast and form a water tight seal. They're perfect for emergency repairs when you need a reliable fix right away. Many of our customers ask about anti-fungal coatings. These special sealants stop mold and mildew from growing on your roof. We recommend them for shady areas where moisture tends to collect.
Our team knows which sealant will work best for your specific roof type. We check the condition of your roof and pick the right product to fix the problem and keep water out.
Roof Leak Detection
Water often travels far from where it enters your roof before showing up inside. We use special infrared tools to spot hidden moisture and temperature changes that point to leaks. These tools help us find problems before they cause major damage.
A careful inspection of your attic can reveal water stains, mold, or wet spots. We check around vents, chimneys, and other spots where materials meet the roof surface. These areas need strong seals to keep water out.
Dark patches on ceilings or walls often mean water is getting in somewhere. Our team traces these marks back to their source to fix the real problem.
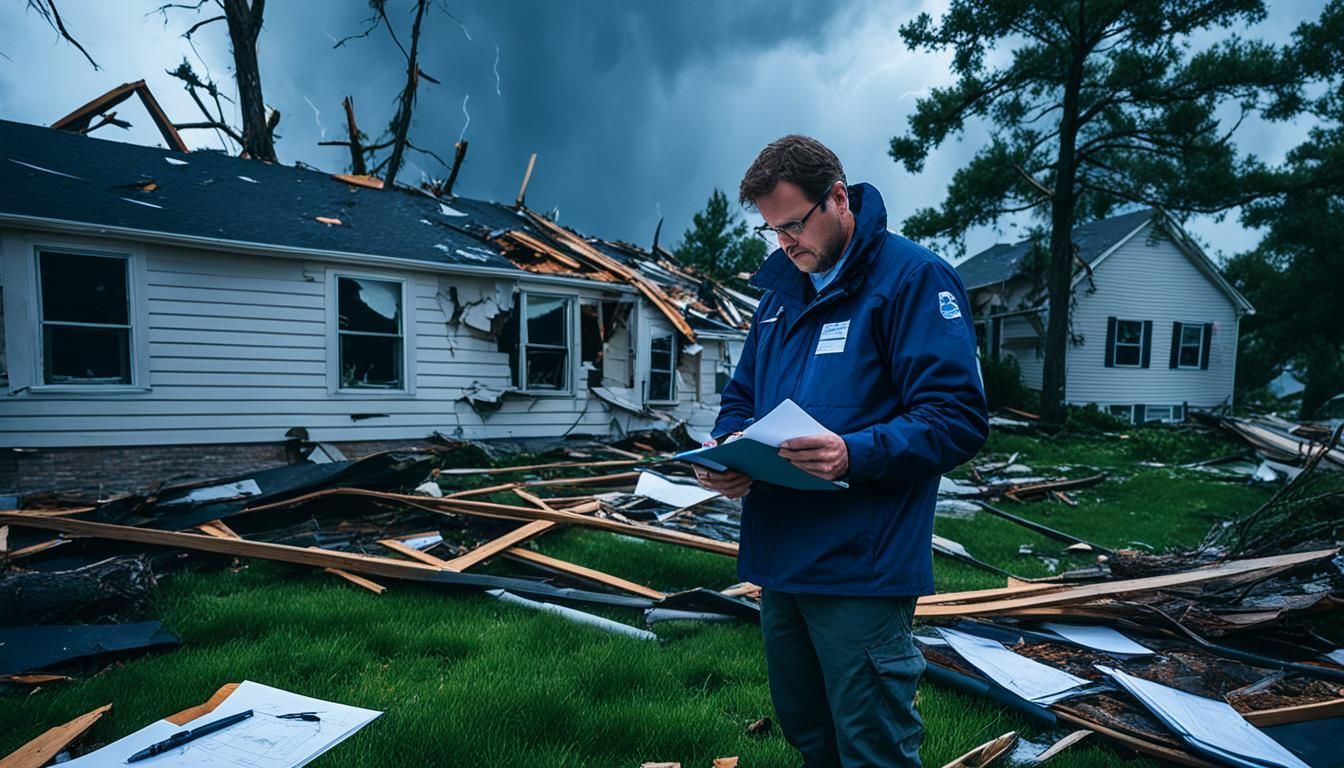
Storm Damage Assessment
Wind and hail leave clear signs of roof damage. Missing shingles, dents in metal parts, or granules washed into gutters tell us where repairs are needed.
We look for lifted or curled shingles that might let water slip underneath. Storms can also crack flashing around chimneys or loosen important seals.
Your gutters need to work right to protect your roof. We check for loose connections, proper slope, and clear drainage paths. Bad gutter flow leads to backup and ice dams in winter.

Common Signs of Roof Wear
Age shows up as cracked, brittle, or cupped shingles. These worn spots make perfect entry points for water. We spot these issues during roof inspections.
Sunlight coming through attic boards means you have gaps that need fixing. Small holes grow bigger over time and lead to rotted wood underneath.
Regular checks of your roof's edges help catch problems early. We look for loose fasteners, gaps in seals, and spots where different materials meet. These joining points often need extra care to stay watertight.
COST OF ROOFING
Use our form to estimate the initial cost of our services.
Roof Sealant Repair Process
This is the text area for this paragraph. To change it, simply click and start typing.
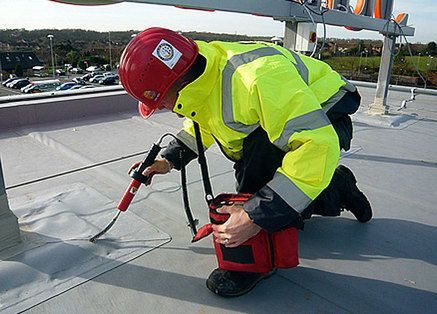
1. Surface Cleaning and Priming
We start with a complete inspection of your roof to find all damaged spots. The repair area needs to be free from dirt, old sealant, and loose materials. We use wire brushes and pressure washing to clean the surface thoroughly.
Your roof must be completely dry before we begin any repair work. We check the weather forecast to ensure at least 24 hours of dry conditions after application.
Next, we apply a primer to help the new sealant bond better. The primer we choose matches your roof's material type - whether it's metal, asphalt, or rubber.
2. Tools and Safety Measures
We bring professional-grade scrapers, brushes, and applicators to every job. Our team wears non-slip boots and safety harnesses when working on steep surfaces.
You'll see us using protective gear like gloves and safety glasses. We keep first aid kits and emergency contact numbers ready.
We set up roof brackets and safety ropes where needed. Our tools are always cleaned and maintained to ensure quality work.
3. Choosing the Right Sealant
We use silicone-based sealants for most repairs because they resist UV rays and extreme temperatures. These sealants last longer than traditional options.
Your roof type determines which product we select. Metal roofs need different sealants than shingle roofs.
We stock multiple sealant colors to match your existing roof. Temperature range and cure time are key factors in our product selection.
Each sealant we use comes with manufacturer certification and warranty coverage. We test small areas first to ensure proper adhesion.
4. Asphalt and Shingle Roof Repair
We use specialized asphalt roofing patches to seal damaged areas on shingle roofs. The first step involves cleaning the damaged spot and removing any loose materials.
We apply a thick layer of roofing adhesive under lifted shingles to create a strong bond. This prevents wind from causing future damage.
For crack repairs, we use a high-grade roof tear patch that matches your existing shingles. The patch gets pressed firmly into place and sealed around all edges.
5. Rubber and TPO Roof Restoration
We start by thoroughly cleaning the rubber or TPO surface with approved cleaners. This step is essential for proper adhesion of the sealant.
Our team uses specialized rubber roof sealant designed specifically for EPDM and TPO materials. We apply it in even strokes to create a waterproof barrier.
For seams and edges, we use reinforced TPO roofing restoration tape. This creates extra protection in vulnerable areas where leaks often start.
6. Flat Roof Sealant Application
We use professional-grade flat roof sealant designed to withstand ponding water. The application starts at the lowest points where water tends to collect.
Our team applies the sealant in multiple thin layers rather than one thick coat. This creates a stronger, more durable seal.
Proper drainage paths must stay clear during application. We carefully work around drains and scuppers to maintain water flow while ensuring complete coverage.
7. Sealing Roof Flashing and Joints
We focus on sealing the metal flashing around chimneys, walls, and valleys where water tends to collect. These spots need flexible sealants that can handle temperature changes without cracking.
Our specialized roof seam tape creates a strong barrier at every joint. We apply durable valley flashing seals to direct water flow away from vulnerable seams.
For chimney flashing repair, we remove old deteriorated sealant and install new high-grade products that bond tightly to both masonry and metal surfaces.
8. Fixing Vents and Skylights
Roof vents and skylights are common spots for leaks. We carefully inspect the rubber boots around pipe vents and replace them if they show signs of aging or damage.
For skylights, we apply premium-grade sealant designed specifically for glass-to-metal connections. This creates a watertight seal while remaining flexible enough to handle frame movement.
We make sure all vent covers are properly attached and sealed to prevent water from entering your attic space.
9. Waterproofing the Roof Edges
The edges of your roof need strong protection against wind-driven rain. We install new weatherstripping along roof edges and inspect fascia boards for signs of water damage.
Our barrier coating system creates an extra layer of protection at roof edges. This helps prevent ice dams in winter and protects against UV damage year-round.
We pay special attention to parapet walls, applying commercial-grade sealant that stops moisture from seeping behind the wall structure.
10. Gutter and Downspout Sealing
Properly sealed gutters protect your roof's edge and foundation. We seal all gutter seams and corners with professional-grade products that prevent leaks.
Our team checks all gutter attachment points and makes sure they're properly sealed to the fascia. This prevents water from getting behind the gutters and damaging your roof structure.
We seal each downspout connection point and ensure proper alignment for optimal water flow away from your home.
Post-Repair Guidelines
After our professional sealant repair work, proper care and attention will keep your roof in top shape. Following these guidelines helps protect your investment and extends the life of the repair.
Curing Time and Conditions
The new sealant needs 24-48 hours to cure completely in dry weather. Keep foot traffic away from repaired areas during this time. Temperature should stay above 50°F (10°C) during the curing process.
We recommend checking weather forecasts before scheduling repairs. Rain or extreme temperatures can affect how well the sealant bonds to your roof surface.
In humid conditions, the curing process might take longer. Watch for signs that the sealant has fully hardened before allowing any activity on the repaired section.
Performing Regular Inspections
Check the repaired areas every three months. Look for any signs of separation between the sealant and roof surface. Watch for bubbles, cracks, or peeling in the sealant material.
Walk your roof carefully after major storms to spot new damage early. Take photos of repaired spots to track changes over time.
Write down dates of inspections and any issues you find. This record helps track the repair's performance and plan future maintenance.
Maintenance Tips for Longevity
Clean debris from your roof every spring and fall. Leaves, branches, and dirt can damage sealant over time. Use a soft brush or leaf blower to avoid scratching the surface.
Keep gutters clear to prevent water from backing up onto sealed areas. Trim overhanging tree branches that could drop debris onto your roof.
Apply a UV-protective coating every 2-3 years to shield the sealant from sun damage. We offer this service as part of our maintenance package.
Test sealed areas with a garden hose annually to ensure they remain waterproof. Contact us immediately if you spot any leaks or separation.